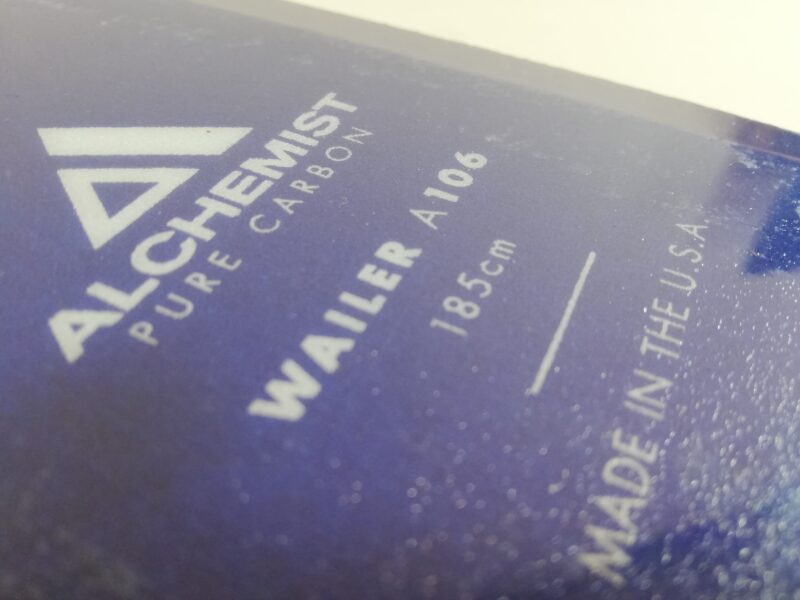
18-19シーズンのワイラーA106を購入したため,忘備録的に正規のdpsの取り付けマニュアルを残しておきます.
近年日本国内でも人気があるメーカーではあるものの,ネットの情報が非常に少ないため参考にしていただければ幸いです.
1.ビンディング取り付けジグをブーツに合わせて調整し,ビンディングメーカーの指示に従って所定の位置に固定します. ビンディングの適切なセンタリングを保証するために、適切なサイズのビンディング取り付けジグを使用する必要があります.
2.DPSスキーの場合,ビンディングは通常メーカー推奨位置に取り付ます.ブーツセンターがスキーのメーカー推奨位置と揃うようにジグを配置します。 スキーのスタイルや乗り手次第でセンターからセットバックやセットフロントでビンディングを取り付けても問題ありません. 必要に応じて,取り付け位置に関する詳細はDPSにお問い合わせください.
3.ドリルビットをカラーに完全に装着し,ドリルビットがカラーから9.0±0.5mmを超えないことを確認します. エポキシ樹脂の焼け付きを避けるために素早く穴を開けます.穴が深くなりすぎるのでカラーをトップシートに通さないでください.
4.穴から切子を完全に取り除き,穴の上部に付着しているバリをすべて取り除きます。 皿ドリルビットはうまく機能しますが,幅または深さが0.5mmを超えないでください.代わりにバリはこすり落とすかやすりで取り除きます.
5.ネジを穴に密封し,トップシートと芯材に接着させることが不可欠です.ネジを取り付ける前に,2液型(ペーストではない)エポキシまたは1液型ポリウレタンで穴を部分的に埋めます.
6.ビンディングメーカーの推奨に従って,すべてのネジを4Nmのトルクでスキーに打ち込みます.4.1±0.1mmのドリルビットの使用をお勧めします. ネジとビンディングがスキーに完全に装着されていることを再確認してください. ネジに必要以上のトルクをかけないでください.
7.ビンディングの組み立て手順に従って,最終的な設置を検査します。
8.穴が損傷している場合,または規定トルクで固定されずにネジが空転する場合は、ビンディングを取り付ける前に修復する必要があります. ファイバー繊維またはスチールウールとエポキシ,もしくはヘリコイルを挿入します.
9.テレマークまたは3ピンビンディングを取り付けるときは,特別注意を払う必要があります.ネジは,ネジの保持力のために適切なネジの太さである必要があります.ネジを適切な長さのアルペンビンディングネジと交換します.ビンディングから8.5mmを超えて突出しないようにします. ネジ穴が密集している3ピンのトゥーピースをスキーに直接取り付けないでください. スキー板の長さに沿って少なくとも7cm離れたネジ穴を使用して,ライザープレートかアダプタープレートにトゥーピースを取り付けます.ネジ穴の密集した3ピンのトゥーピースをスキーに直接取り付けると,関連する損傷の保証が無効になります.
10.余分な穴を開けたり,ビンディングを再度取り付けたりすると穴が近すぎるため,関連する損傷の保証が無効になる場合があります. 余分な穴は少なくとも1cm離す必要があり,できれば2cm離すと,スキーの強度と耐久性が大幅に低下する可能性があります.
原文も載せておきます.参考にして下さい.
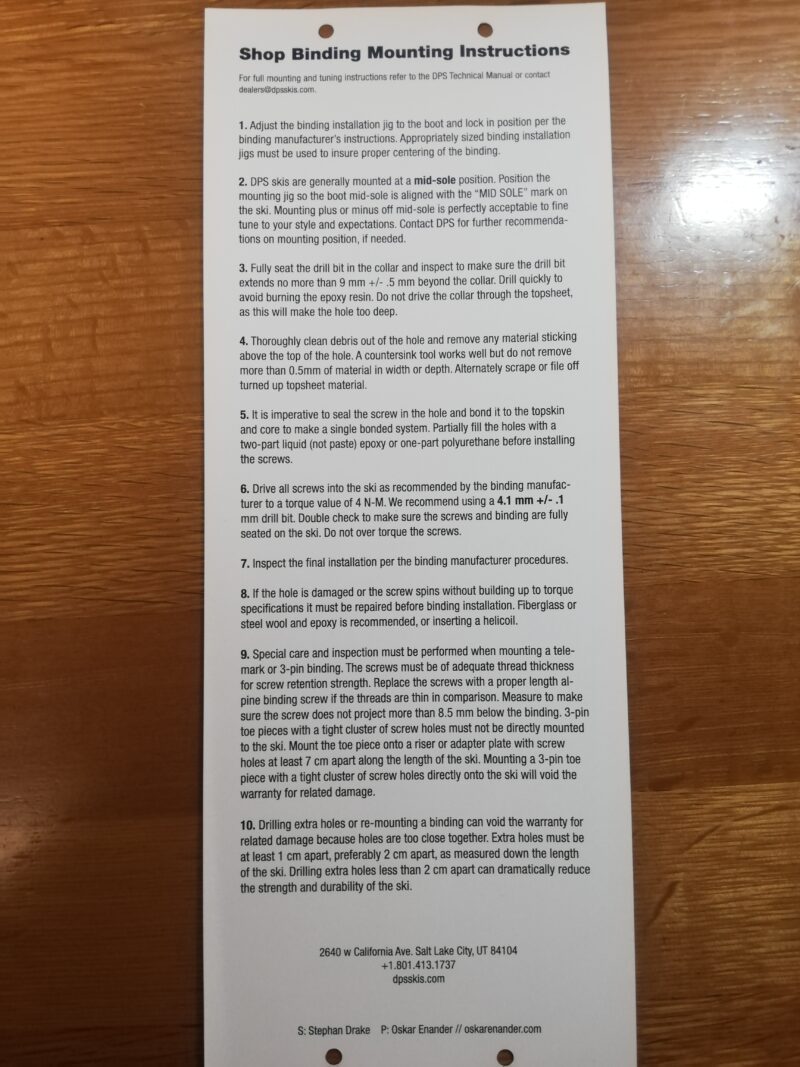
Shop Binding Mounting Instructions
1.Adjust the binding installation jig to the boot and lock in position per the binding manufacture’s instructions. Appropriately sized binding installation jigs must be used to insure proper centering of the binding.
2.DPS skis are generally mounted at a mid-sole position. Position the mounting jig so the boot mid-sole is aligned with the ”MID SOLE” mark on the ski. Mounting plus or minus off mid-sole is perfectly acceptable to fine tune to your style and expectations. Contact DPS for further recommendations on mounting position, if needed.
3.Fully seat the drill bit in the collar and inspect to make sure the drill bit extends no more than 9mm +/-. 5mm beyond the collar. Drill quickly to avoid burning the epoxy resin. Do not drive the collar through the topsheet, as this will make the hole too deep.
4.Thoroughly clean debris out of the hole and remove any material sticking above the top of the hole. A countersink tool works well but do not remove more than 0.5mm of material in width or depth. Alternately scrape or file off turned up topsheet material.
5.It is imperative to seal the screw in the hole and bond it to the topskin and core to make sure a single boned system. Partially fill the holes with a two-part liquid (not paste) epoxy or one-part polyurethane before installing the screws.
6.Drive all screws into the ski as recommended by the binding manufacture to a torque value of 4Nm. We recommend using a 4.1mm +/-.1mm drill bit. Double check to make sure the screws and bindings are fully seated on the ski. Do not torque the screws.
7.Inspect the final installation per the binding manufacture procedures.
8.If the hole is damaged or the screw spins without binding up to torque specifications it must be repaired before binding installation. Fiberglass or steel wool and epoxy is recommended, or inserting a helicoil.
9.Special care and inspection must be performed when mounting a telemark or 3-pin binding. The screws must be of adequate thread thickness for screw retention strength. Replace the screws with a proper length alpine binding screw does not project more than 8.5mm below the binding. 3-pin toe pieces with a tight cluster of screw holes must not be directly mounted to the ski. Mount the top piece onto a riser or adapter plate with screw holes at least 7cm apart along the length of the ski. Mounting a 3-pin toe piece with a tight cluster of screw holes directly onto the ski will void the warranty for related damage.
10.Drilling extra holes or re-mounting a binding can void the warranty for related damage because holes are too close together. Extra holes must be at least1cm apart, preferably 2cm apart can dramatically reduce the strength and durability of the ski.
終わり